
How to Create a Support Email Address for Your Team
How to Create a Support Email Address for Your Team ! Hands placing label on mailbox model The fastest professional route is a branded support@yourdomain.

The fastest professional route is a branded support@yourdomain.com address connected to a real email host, then linked to a shared inbox so your team can actually work from it. If you already pay for business email hosting, add an alias or mailbox in five minutes. If you don’t, buy a domain and set up hosting first, following this practical step-by-step guide for consultants and small firms on domain purchase and host selection, since Microsoft’s guidance confirms a domain-based address builds far more customer trust than a free Gmail or Outlook.com account ever will.
TL;DR:
- Most small teams should start with a single support@domain.com address before adding department-specific aliases, which require sufficient volume to justify.
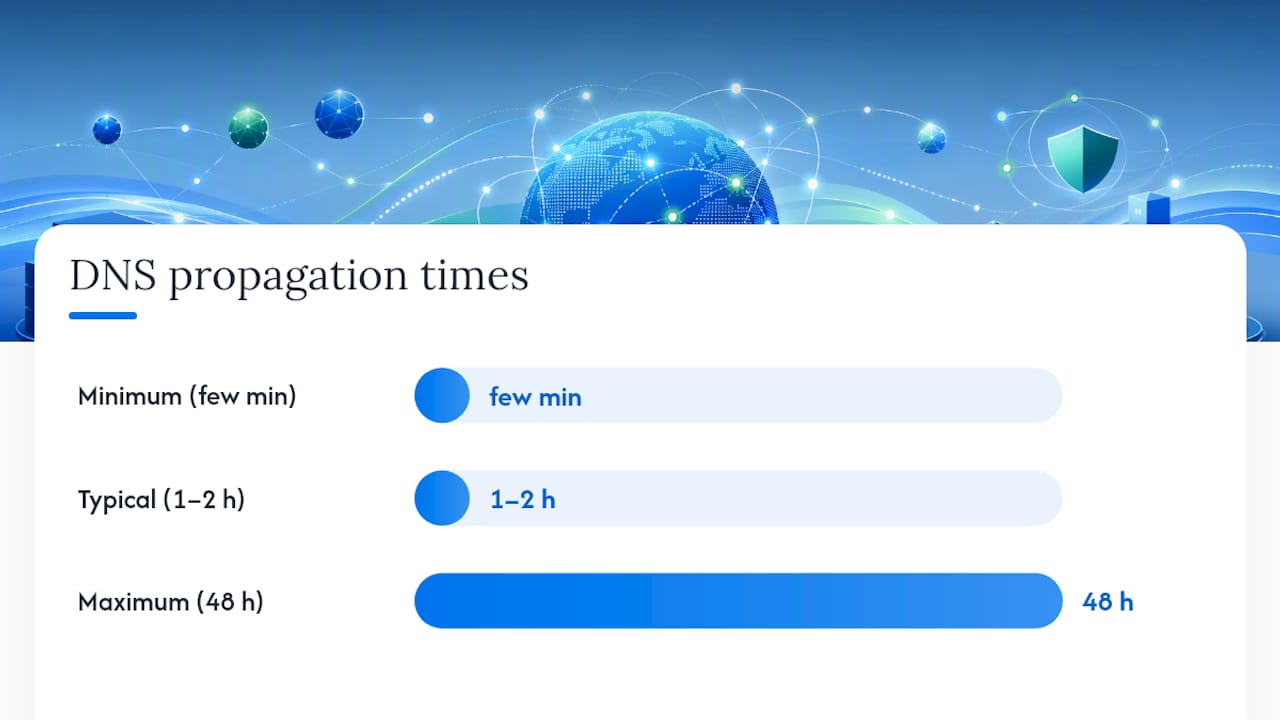
- Verifying a support mailbox involves accurate DNS record placement, including TXT or CNAME records, MX, SPF, DKIM, and DMARC, with propagation times potentially up to 48 hours.
- Implementing proper routing, such as assigning each message to one team member and using tags, prevents overlapping replies and improves workflow efficiency.
- Using shared inbox tools like Sendsync offers fast setup, direct connection to existing mailboxes, and avoids the complexity and cost of migrating to full helpdesk platforms.
- Protect compliance and customer trust by limiting access, setting retention policies, and avoiding collecting sensitive data through support emails, especially for customers in GDPR jurisdictions.
Table of Contents
- How Do You Create a Support Email Address That Fits Your Team?
- What Domain and Email Host Should You Use?
- What Are the Steps to Create and Verify a Support Mailbox?
- Why Do SPF, DKIM, and DMARC Matter for Support Email?
- How Should You Route and Assign Support Email as a Team?
- What’s the Go-Live Checklist Before You Announce Your Support Address?
- Why Is a Shared Inbox the Fastest Path for Small Teams?
- How Do You Handle Support Email Data Under Privacy Rules Like GDPR?
- What Small Teams Get Wrong When Setting Up Support Email
- Get Your Support Inbox Running With Sendsync
- Sources
How Do You Create a Support Email Address That Fits Your Team?
Before touching DNS records or hosting dashboards, decide on the address structure itself. This choice shapes everything downstream, from how customers perceive your business to how cleanly your team can split up incoming requests.
For most small businesses, a single support@yourdomain.com address works fine up to a certain volume. Once you’re fielding requests across billing, technical issues, and general questions, department aliases start paying off: support@, billing@, sales@. Microsoft notes that most business-class hosts let you run several aliases under one domain, so messages get segmented and prioritized before anyone even opens them.
There’s also subaddressing, sometimes called plus addressing, where you tack an extra tag onto an existing address, like support+billing@yourdomain.com. It’s a lighter alternative to a full alias because it doesn’t always require separate DNS configuration, but not every host supports it the same way. Zoho Mail’s setup guide points out that alias support varies by provider, so check what your host handles natively before assuming plus addressing will work the way you expect.
A few naming rules keep things simple for both customers and your team:
- Keep it short and obvious: support@, help@, or care@ beat anything clever or branded.
- Match the tone customers expect: “help@” reads more casual than “support@,” which reads more formal.
- Stay consistent across departments so sales@, billing@, and support@ follow the same pattern.
- Avoid personal names in a shared address; support@ should never be tied to one employee who might leave.
Once the address exists, think about what customers see when a reply lands in their inbox. Set the “from” name to something like “Acme Support” rather than a person’s name, so it reads as a team, not an individual. Write a short autoresponder that confirms receipt and sets a rough response time, and build a signature block that includes your business name and a link to a help center if you have one. These small details do more for perceived professionalism than most businesses realize, and they cost nothing to set up.
What Domain and Email Host Should You Use?
You need two things before an address exists at all: a domain and an email host. Chamber of Commerce. If you already own a domain for your website, you’re halfway done. If not, registering one takes about ten minutes through any registrar.
At checkout, watch for a few things that catch people off guard later: WHOIS privacy protection (so your name and address aren’t public record), auto-renewal settings, and the actual renewal price after any first-year discount expires. Domains often get sold at a steep introductory rate, then jump significantly on renewal.
With a domain secured, you’ll pick a host. The three most common choices for small businesses are:
- Google Workspace — Gmail’s interface with your own domain, straightforward setup, and detailed domain verification and mailbox creation documentation.
- Microsoft 365 — Outlook and the full Office suite bundled in, a natural fit if your team already works in Word and Excel.
- Zoho Mail — a lighter-weight, budget-friendly option with a five-minute setup guide covering aliases and permissions.
Some registrars also bundle in basic email hosting at checkout, which can work fine for a single mailbox, but tends to lack the alias flexibility and admin controls that Google Workspace, Microsoft 365, and Zoho Mail all offer.
Time and cost snapshot: Registering a domain typically costs a modest annual fee depending on the extension. Business email hosting through Google Workspace, Microsoft 365, or Zoho Mail generally involves a monthly cost per user, with most providers offering a free trial before committing to a paid tier. Total setup time, domain to working inbox, usually lands under an hour if DNS propagation cooperates.
A host-provided mailbox is enough if you’re a solo owner handling all support yourself. The moment a second person needs to see and reply to the same messages, you’re better off pairing that mailbox with a shared inbox tool rather than trying to manage a shared login across employees, which creates its own security headaches.
What Are the Steps to Create and Verify a Support Mailbox?
This is the part that trips people up, not because it’s hard, but because DNS settings live in a different place than your email host, and the two systems have to talk to each other correctly.
- Log into your domain registrar and find the DNS management section. This is usually labeled “DNS,” “Nameservers,” or “Advanced DNS,” depending on the registrar.
- Grab your verification record from your email host’s setup wizard. Google Workspace, Microsoft 365, and Zoho Mail will each generate a TXT or CNAME record specific to your account.
- Paste that record into your DNS manager exactly as given, including any trailing characters. A single typo here is the most common reason verification fails.
- Wait for DNS propagation. This can take anywhere from a few minutes to 48 hours, though most changes settle within an hour or two.
- Create the mailbox or alias inside your host’s admin console once verification clears. Choose a full mailbox if this address needs its own login and storage; choose an alias if it should simply forward into an existing mailbox.
- Add MX records so incoming mail actually routes to your new host instead of getting lost. Your host’s setup page will list the exact values.
- Add an SPF TXT record, which tells other mail servers which systems are allowed to send email on your domain’s behalf.
- Set up basic DKIM through your host’s console, since this adds a cryptographic signature that helps receiving servers trust your messages.
- Send a test email from the new address to a personal Gmail or Outlook account and confirm it lands in the inbox, not spam.
If you’re routing this address into a helpdesk or shared inbox platform rather than reading it directly in Google Workspace or Microsoft 365, there’s an extra layer: most third-party tools require a forwarding verification step before they’ll accept mail on your behalf. Zendesk’s own API documentation shows this is standard practice across the industry. Expect a confirmation email sent to the new address, which you then click or forward to complete the link, plus a short wait while forwarding rules propagate.
Pro Tip: Screenshot every DNS record before you leave your registrar’s dashboard. If verification fails and you need to troubleshoot with support, having the exact values on hand saves a frustrating back-and-forth where you’re re-copying settings from memory.
Why Do SPF, DKIM, and DMARC Matter for Support Email?
Getting your support address to exist is one problem. Getting your replies to actually land in a customer’s inbox instead of their spam folder is a separate one, and it depends on three DNS records working together.
SPF (Sender Policy Framework) lists which mail servers are authorized to send email for your domain. DKIM (DomainKeys Identified Mail) attaches a digital signature to outgoing mail, so receiving servers can confirm the message wasn’t altered in transit. DMARC (Domain-based Message Authentication, Reporting, and Conformance) tells receiving servers what to do when a message fails SPF or DKIM checks, whether to quarantine it, reject it outright, or just let it through and log the failure.
You’ll find the exact values to enter for each of these inside your host’s setup console. Google Workspace’s help documentation walks through where to locate domain verification and DKIM values specifically, and Microsoft 365 and Zoho Mail publish equivalent pages.
A few mistakes account for most deliverability problems small teams run into:
- Publishing two separate SPF records instead of merging them into one, which most mail servers will reject outright.
- Forgetting to enable DKIM signing inside the host console even after adding the DNS record.
- Setting DMARC straight to a “reject” policy on day one, before confirming SPF and DKIM both pass cleanly.
- Leaving default TTL settings so high that record changes take a full day to propagate during troubleshooting.
Start DMARC in monitoring mode (“p=none”) so failures get logged and emailed to you without actually blocking anything. Once a week or two of reports show clean SPF and DKIM alignment, move to a stricter quarantine or reject policy. Skipping straight to strict enforcement is how legitimate support replies end up silently dropped, which is a bad way to lose a customer who was already trying to reach you.
How Should You Route and Assign Support Email as a Team?
A single shared login is the most common early mistake small teams make, and it’s also the fastest way to end up with two people replying to the same customer with contradicting answers. Once more than one person touches a support inbox, you need real routing.

There are a few standard patterns. Mailbox delegation inside Google Workspace or Microsoft 365 lets multiple people access one inbox using their own login, which solves the shared-password problem but still leaves everyone staring at the same undivided list. Forwarding into a dedicated helpdesk platform adds ticketing structure on top, though it usually means a heavier setup and a monthly per-agent fee. A shared inbox tool sits between those two, layering assignment, tags, and internal notes directly onto the mailbox you already have, without asking you to migrate mail somewhere new. Sendsync’s connection to Gmail and Microsoft 365 mailboxes is built specifically for this middle path, and it’s worth reading through shared inbox best practices if you want the fuller routing playbook.
Whatever workflow you land on, a few ground rules keep things from breaking down as your team grows:
- Assign every incoming message to one person before anyone replies, so ownership is never ambiguous.
- Use tags for issue type (billing, bug, refund) so patterns show up before they become a backlog.
- Keep internal notes visible only to your team, separate from anything the customer sees.
- Set a simple SLA, like “first response within four business hours,” and track it somewhere visible.
Pro Tip: Assign a message the moment it’s read, even before you’ve written a reply. Unassigned messages that sit in a shared inbox for more than a few minutes are almost always the ones two people accidentally answer at once.
New agents should get access scoped to what they actually need. A support rep handling billing questions doesn’t need visibility into sales@ or HR-related aliases, and locking that down early avoids a messy permissions cleanup later. Guidance on assigning emails to teammates effectively covers the specific permission structures worth setting up before you onboard a second or third agent.
What’s the Go-Live Checklist Before You Announce Your Support Address?
Don’t publish support@yourdomain.com on your website footer the same day you set it up. Run it through a short verification pass first.
- Send test emails from three different providers, Gmail, Outlook.com, and one more if you can, and check the message headers for “SPF: PASS” and “DKIM: PASS” rather than just trusting that it arrived.
- Confirm forwarding and autoresponders fire correctly if you’ve routed the address into a shared inbox or helpdesk, and verify that a test message actually creates a ticket or conversation on the receiving end.
- Soft-launch internally first. Have a few teammates or friends send real-world test messages, then monitor for 24 to 72 hours before putting the address anywhere public.
- Watch for the two most common failures: mail simply not arriving (usually an MX record issue) and forwarded mail stuck in an unverified state (usually a missed confirmation click on the receiving platform).
If something breaks, check DNS propagation first using any free DNS lookup tool, since a record that looks correct in your registrar dashboard can still be mid-propagation and returning stale results elsewhere.
Why Is a Shared Inbox the Fastest Path for Small Teams?
Most of the setup pain described above, DNS records, verification waits, mailbox migrations, comes from trying to bolt a full helpdesk platform onto a small team that doesn’t need one yet. Sendsync sidesteps that entirely by connecting directly to the Gmail or Microsoft 365 mailbox you already have, with none of the DNS reconfiguration a traditional helpdesk demands.
That matters because the setup steps in this article, buying a domain, verifying DNS, configuring SPF and DKIM, still apply no matter which tool sits on top of your mailbox. What Sendsync removes is everything after that: instead of migrating mail into a new system, you connect your existing inbox and get assignment, internal notes, tags, and saved views immediately.
For a five-person support team, that difference is the gap between a setup that takes an afternoon and one that takes a week of platform migration. Pricing runs on unlimited users rather than per-seat fees, so adding a sixth or tenth teammate doesn’t change your bill.
A shared inbox like this fits teams handling a steady but not overwhelming volume of support email, where speed of setup and simplicity of workflow matter more than the deep ticketing automation a full helpdesk platform offers. If your team is genuinely enterprise-scale with complex multi-tier escalation paths, a heavier platform might justify its overhead. For most small businesses, it won’t.
How Do You Handle Support Email Data Under Privacy Rules Like GDPR?
Support inboxes accumulate personal data fast: names, email addresses, account details, sometimes payment information customers paste into a message without thinking twice. If any of your customers are in the European Union or UK, GDPR applies regardless of where your business is based, and similar principles increasingly show up in US state privacy laws too.
A few practices reduce your exposure without requiring a legal team. First, limit who can see which messages; a support rep handling general questions doesn’t need access to billing threads that might contain financial details. Second, set a retention policy rather than letting old tickets sit indefinitely; most privacy frameworks favor deleting data once it’s no longer needed for the purpose it was collected. Third, if a customer asks what data you hold on them or asks for it to be deleted, you need a way to search and export that quickly, which is easier with a searchable shared inbox than with an inbox split across five people’s separate logins.
Avoid asking customers to email sensitive information like full card numbers or government ID through a support address at all; direct that toward a secure form instead. None of this requires new software, just a written policy your team actually follows, and a mailbox setup that makes access control possible in the first place.
What Small Teams Get Wrong When Setting Up Support Email
The single biggest mistake is treating the address like a checkbox instead of a workflow. Teams buy the domain, configure DNS, and stop there, then wonder six weeks later why two people replied to the same angry customer with different answers. The address was never the hard part. Deciding who owns which message was.
The second mistake is overbuilding on day one. A five-person team doesn’t need department aliases for support, billing, refunds, and escalations before they’ve handled a single real ticket. Start with one address, watch the volume for a month, then split it once a genuine pattern shows up.
The third: skipping the DMARC monitoring phase and jumping straight to strict enforcement, which quietly drops legitimate replies exactly when a customer is already frustrated.
Two rules of thumb worth keeping: only add an alias when a category is generating enough volume to justify separate routing, and only add a new tool when your current one is causing friction, not before. Teams that pair a branded address with a lightweight shared inbox from the start tend to cut response times noticeably, simply because nobody’s guessing who’s already answered a message.
— Nick
Get Your Support Inbox Running With Sendsync
Sendsync gets you from a verified support address to a working team inbox without the DNS detour a traditional helpdesk requires. Once your mailbox exists and passes the checks above, connecting it to Sendsync takes about ten minutes: link your Gmail or Microsoft 365 account, and you’re already looking at a shared view of every incoming message.
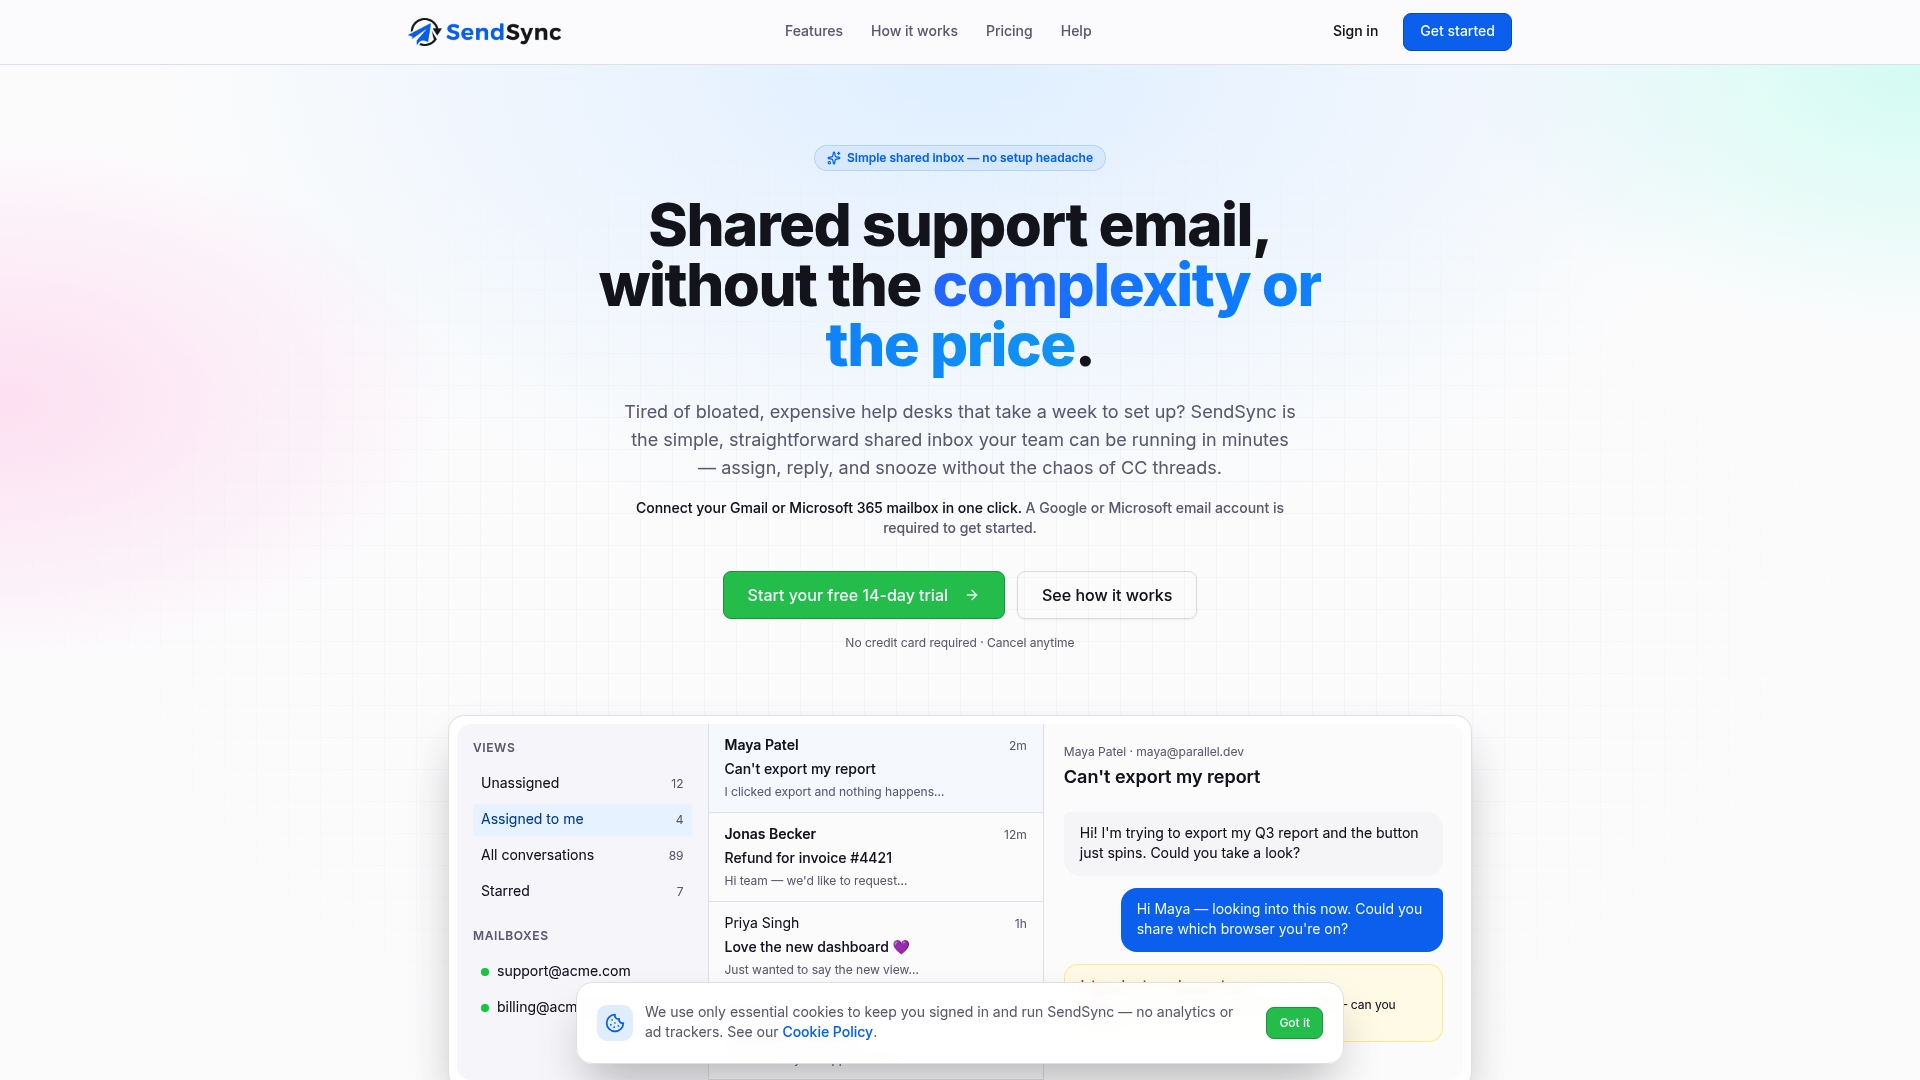
From there, three things are worth doing in your first session. Connect the support@yourdomain.com mailbox you just set up. Build one saved view filtered by an unanswered tag, so nothing sits untouched. Invite a teammate and assign them their first conversation, just to see the workflow in action. Since pricing runs on unlimited users rather than per-seat fees, that teammate doesn’t change your bill, and neither does the next one. Organizing that workflow further gets easier with a few inbox organization strategies built for exactly this stage of a growing team.
Start a free trial at Sendsync and connect your support mailbox today.
Sources
- Create a Professional Business Email Address
- Create a Professional Business Email Address
- How to create a business email in 5 minutes | Zoho Mail
- How to Set Up a Business Email Address