
How to Switch from Freshdesk: Migration Checklist
How to Switch from Freshdesk: Migration Checklist ! Hands unplugging Ethernet cable for migration If you're ready to switch from Freshdesk, the clearest path for most small to mid-size support teams is a shared-inbox model.

If you’re ready to switch from Freshdesk, the clearest path for most small to mid-size support teams is a shared-inbox model. Start with Sendsync. Before you do anything else, pull a 30–100 ticket sample via the Freshdesk API, block off a one-week demo window in your calendar, and tell your team when the cutover is happening.
Why bother? Three reasons:
- Reduce complexity. Freshdesk’s ticketing layers, parent-child rules, and automation stacks add overhead most teams never fully use.
- Lower per-agent cost. Per-seat pricing at Freshdesk’s mid tiers climbs fast. Sendsync runs on unlimited-user plans.
- Faster onboarding. A shared inbox with Gmail or Microsoft 365 integration takes minutes to connect, not days to configure.
Gartner Peer Insights confirms what most support managers already feel: teams start looking for Freshdesk alternatives when they need simpler workflows, deeper integrations, or stronger reporting without the complexity tax.
Key Takeaways
Switching from Freshdesk is fastest when you export via API, run a demo migration before cutover, and keep Freshdesk read-only for at least 30 days after going live.
| Point | Details |
|---|---|
| Export via API, not CSV | Use GET /api/v2/tickets?include=conversations to preserve threading, notes, and attachments. |
| Run a demo migration first | Test 100 tickets, 10 agents, and 10 KB articles before touching production data. |
| Pause automations during import | Disable time-based rules to prevent state drift and false SLA breaches. |
| Timeline scales with complexity | Small teams finish in 1–2 weeks; mid-size operations typically need 3–5 weeks. |
| Sendsync as the replacement | Connects Gmail or Microsoft 365 in minutes, with unlimited users and no per-agent fees. |
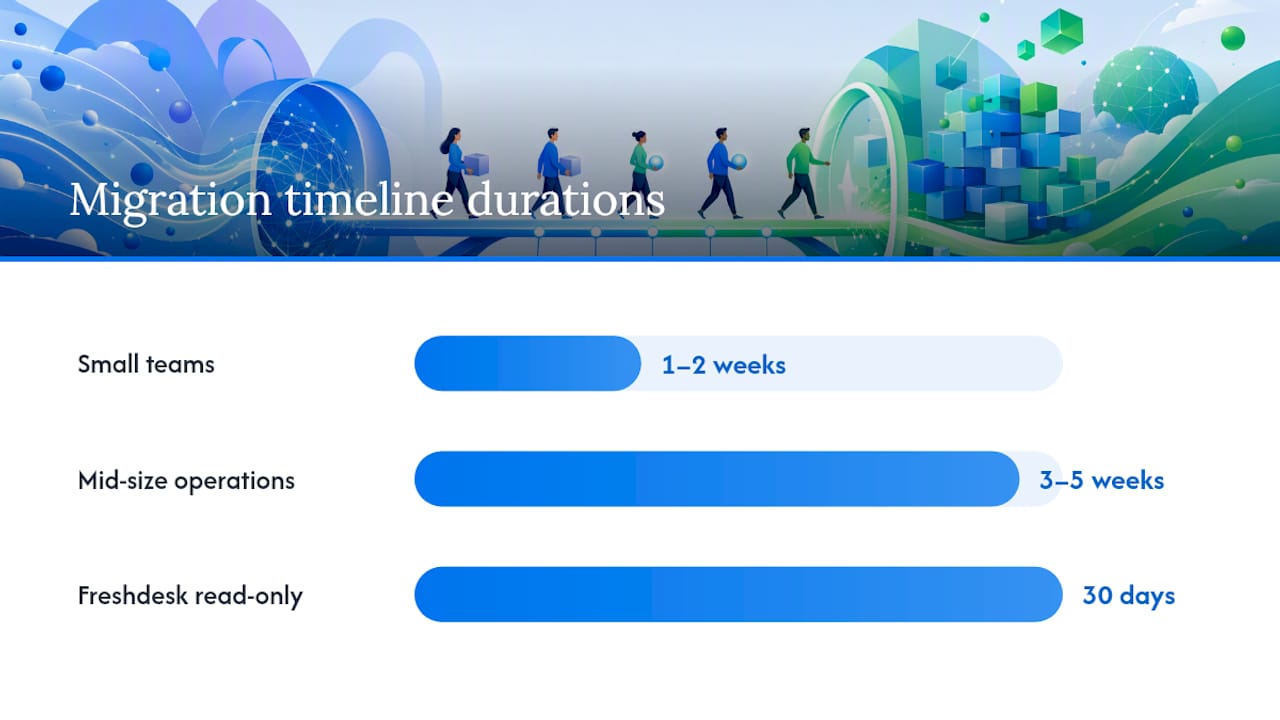
Table of Contents
- How to switch from Freshdesk: the full migration checklist
- What data can you export from Freshdesk, and how?
- How to prepare Freshdesk before you start exporting
- How to run a demo migration and what to check
- What to do after the migration goes live
- How long does a migration take, and what drives the cost?
- Why a shared inbox fits most teams leaving Freshdesk
- How to safely cancel your Freshdesk account
- Common migration problems and how to fix them
- What most migration guides get wrong
- Sendsync makes the move off Freshdesk faster
- Sources
How to switch from Freshdesk: the full migration checklist
Every migration has the same five phases. The order matters.
- Discovery and audit (Days 1–3, owned by support ops). Count your active tickets, agents, automations, custom fields, and KB articles. Export a sample to validate your data before committing to a full pull.
- Data export (Days 3–7, owned by IT or support ops). Export tickets via API, contacts and companies via CSV or API, and KB articles via public export or API. Download attachments separately.
- Field and workflow mapping (Days 5–10, owned by support ops). Map required fields first: email, subject, created_at, status, priority. Save optional custom fields for phase two if they slow you down.
- Demo migration and verification (Days 8–14, owned by support ops + QA). Import 100 tickets, 10 agents, and 10 KB articles into the new system. Run acceptance checks before touching production.
- Staged cutover and archive (Days 14–21+, all hands). Switch email routing, verify inbound channels, keep Freshdesk read-only for 30–90 days.
Pro Tip: Freeze all time-based automations in Freshdesk the moment you start exporting. State drift, where a ticket’s status changes mid-export, is the single most common cause of mismatched records on the other side.
Zolify’s migration guide notes that rebuilding automations and SLA policies in the target platform typically consumes more time than the data transfer itself. Budget time for it.
What data can you export from Freshdesk, and how?
Here’s the full inventory of exportable data types and the recommended method for each:
| Data type | Best export method | Import notes |
|---|---|---|
| Tickets + conversations | API (GET /api/v2/tickets?include=conversations) |
Preserves threading, internal notes, and metadata |
| Contacts | CSV export or API | Map email as the primary key |
| Companies | CSV export or API | Link to contacts post-import |
| Knowledge base articles | Public export or API | Check formatting; HTML may need cleanup |
| Attachments | API download (per ticket) | Store locally; re-upload to new system |
| Custom fields | API or manual inventory | Map to target fields before import |
| Tags | API | Recreate as labels or categories in new system |
The API beats CSV for tickets every time. CSV flattens conversation threads into a single row, which means you lose reply history, internal notes, and agent attribution. The endpoint GET /api/v2/tickets?include=conversations returns the full thread as nested objects, which any import script can parse cleanly.
A few things to handle explicitly:
- Attachments are not embedded in the API response. You get a URL; you must download each file separately and re-upload it.
- Custom fields need a field inventory before you start. Map required fields first, optional ones later.
- Tags transfer as strings. If the target system uses a different taxonomy, plan a mapping table.
How to prepare Freshdesk before you start exporting
Skipping this step is how migrations end up with duplicate records and phantom automations firing in the new system.
- Inventory your automations. Open Freshdesk’s Admin panel and document every Dispatch’r, Supervisor, and Observer rule: its trigger, conditions, and action. Screenshot or export to a spreadsheet.
- Snapshot custom fields and views. Go to Admin > Ticket Fields and export the full list. Do the same for saved views and canned responses.
- Prune unused fields. Any field with zero tickets in the last 90 days is a candidate for deletion. Fewer fields mean a cleaner mapping exercise.
- Create an exports folder. Set up a shared folder (Google Drive, SharePoint, or S3) before you pull a single file. Attachments pile up fast.
- Get your API key. In Freshdesk, go to Profile Settings > API Key. Copy it and store it in your password manager. Use it with pagination (
per_page=100&page=N) to avoid hitting rate limits on large exports.
Pro Tip: Disable or pause time-based automations and any temporary tags before you export. A Supervisor rule that escalates tickets after 4 hours will keep firing during a long export window, changing ticket states underneath you.
How to run a demo migration and what to check
A demo migration is not optional. It’s the only way to know your import script works before you touch production data.
Recommended demo scope:
- 100 recent tickets (mix of open, pending, and closed)
- 10 agent accounts
- 10 KB articles (include at least one with images)
- All attachments for the sampled tickets
Acceptance checklist:
- Conversation threads are intact, in chronological order.
- Internal notes are visible and labeled correctly.
- Attachments open and match the originals (spot-check file sizes).
- SLA timers are paused or handled correctly (not showing false breaches).
- Email links and any CRM references in ticket bodies still resolve.
- Custom field values match the source records.
Test cases to run after import:
- Create a new ticket from scratch in the new system.
- Reply as an agent and verify the customer would receive the email.
- Escalate the ticket to a second agent and confirm the assignment notification.
- Apply a saved reply (macro equivalent) and check formatting.
- Close the ticket and verify any webhook or automation fires correctly.
For scalable workflow patterns to test against, Sendsync’s inbox workflow examples are worth reviewing before you write your test cases.
What to do after the migration goes live
The cutover is not the finish line. These tasks determine whether agents can actually work without reopening Freshdesk.
Cutover checklist:
- Switch email routing (MX records or forwarding rules) to the new system’s inbound address.
- Replace any embedded support widgets on your website or app.
- Update DNS or email forwarding if you use a custom support address.
- Verify every inbound channel (email, chat, form) delivers to the new inbox.
Post-migration items:
- Rebuild automations from your documented inventory. Do not attempt a 1:1 copy; rebuild with the new system’s logic in mind.
- Recreate SLA policies and escalation rules.
- Rebuild canned replies and macros.
- Reconfigure reporting dashboards and any scheduled exports.
- Run agent training sessions before the first full day on the new system.
Training tips: Run live parallel cases for at least 72 hours, where agents handle real tickets in both systems simultaneously. Assign peer coaches (one experienced agent per 3–4 new users). Keep Freshdesk in read-only mode for 1–2 weeks so agents can reference old threads without creating new tickets there. Shared inbox best practices cover the workflow habits that speed up adoption.
How long does a migration take, and what drives the cost?
Timeline by team size, based on practitioner guidance from Zolify:
- Small teams (under 10 agents, under 10,000 tickets): 1–2 weeks
- Mid-size teams (10–50 agents, 10,000–100,000 tickets): 3–5 weeks
- Large or complex operations: 6–8+ weeks
The biggest cost drivers:
- Ticket volume. More records mean longer export and import windows, more QA time, and higher fees if you use a migration vendor.
- Number of automations. Each rule needs to be documented, mapped, and rebuilt. Twenty rules take a day; two hundred take a week.
- Custom apps and integrations. Any Freshdesk Marketplace app that your team relies on needs a replacement or a custom integration in the new system.
- Attachment storage. Large attachment libraries require significant download bandwidth and re-upload time.
- Developer resources. If no one on your team can write a basic API script, you’ll need either a developer or a third-party migration service.
DIY vs. vendor vs. migration service:
- DIY API scripts work well for teams with a developer and under 50,000 tickets. Full control, lowest cost, highest effort.
- Third-party migration tools (listed on Capterra) handle tickets, contacts, conversations, and attachments for a fee based on record counts. Fast, but G2 reviews show that edge cases and custom automations often still require manual fixes or scripting.
- Migration services make sense for large, complex operations where downtime risk is high and internal developer capacity is limited.
Why a shared inbox fits most teams leaving Freshdesk
Spotsaas documents the recurring reasons teams move on: pricing jumps at mid tiers, limited integrations on entry plans, and reporting or customization constraints that require upgrading to plans most small teams can’t justify.
Sendsync addresses those pain points directly. Connect a Gmail or Microsoft 365 mailbox in minutes, no DNS configuration required. Every agent works from the same inbox with assignment, internal notes, tagging, saved views, and automation for triage built in. Unlimited users on a flat plan means your cost doesn’t scale with headcount.
For teams moving away from Freshdesk, the practical migration path with Sendsync is short:
- Connect your support mailbox (Gmail or Microsoft 365).
- Import your contacts and the KB articles your agents reference most.
- Route one email channel through Sendsync for a one-week test.
- Validate that agents can open, reply, assign, and close tickets without touching Freshdesk.
Sendsync fits best for small to mid-market professional services teams, SaaS companies under 50 agents, and any operation that has been running Freshdesk mostly as a shared email manager with some automation on top. If your team spends more time managing Freshdesk than answering customers, the shared inbox vs. helpdesk comparison lays out exactly where the trade-offs land.
Pro Tip: Route a single low-volume channel through Sendsync first, not your main support address. One week of real traffic on a secondary channel tells you more than any demo.
How to safely cancel your Freshdesk account
Don’t cancel until your new system has handled at least two full weeks of live traffic without issues.
- Export your full account data. Use Admin > Account > Export to pull a final archive of tickets, contacts, and KB articles.
- Confirm backups. Verify the export files are complete and stored in at least two locations.
- Check your contract. Annual plans auto-renew. If you’re within 30 days of renewal, contact Freshdesk billing directly to avoid an unwanted charge.
- Request cancellation. Go to Admin > Account Settings > Cancel Subscription. Follow the confirmation steps.
- Preserve billing records. Download invoices before cancellation; they may not be accessible after the account closes.
Keep Freshdesk in read-only mode for 30–90 days after cancellation if your plan allows it, or longer if your industry has audit or compliance requirements. Agents will occasionally need to reference a historical thread during that window.
Common migration problems and how to fix them
Missing attachments. The API returns a URL, not the file. If your script didn’t download and re-upload each attachment, they’ll show as broken links. Fix: re-run the attachment download step against the affected ticket IDs and re-upload.

Flattened conversation threads. This happens when you use CSV instead of the API. Fix: re-export affected tickets using GET /api/v2/tickets?include=conversations and re-import.
Mismatched custom fields. A field that exists in Freshdesk but has no mapping in the target system gets dropped silently. Fix: audit your field inventory against the import log and add missing mappings before re-running.
SLA timer anomalies. Tickets imported with old timestamps can trigger false SLA breaches. Fix: pause SLA rules during import, verify timestamps on a sample of 20–30 tickets, then re-enable rules.
Duplicate contacts. This usually happens when the same email appears under slightly different formats. Fix: deduplicate your contacts CSV before import using email as the primary key.
Debugging checklist:
- Compare export counts (tickets, contacts, attachments) against import counts.
- Spot-check 10–20 ticket IDs across both systems.
- Validate attachment file sizes on a sample.
- Review field mapping logs for dropped or null values.
- Replay your five demo test cases on the production import.
Pro Tip: Import your most recent 90 days of tickets first. Get agents working on current cases in the new system before you bring in historical data. Historical imports can always run in the background; a broken current-ticket workflow cannot.
What most migration guides get wrong
Most migration guides treat the data transfer as the hard part. It isn’t. The hard part is the 72 hours after cutover, when agents are handling live customer conversations in an unfamiliar system while also fielding internal questions about where things went.
The teams that navigate this cleanly do one thing differently: they run live parallel cases before the full cutover, not after. Pick five to ten real tickets and work them simultaneously in both Freshdesk and the new system for three days. Agents learn the new workflow on real work, not on a training exercise. By the time the switch flips, the system feels familiar.
The single corrective action that reduces cutover risk more than anything else: keep Freshdesk open in read-only mode for at least one week post-cutover. Not as a fallback, but as a reference. Agents who can look up a historical thread without panicking are agents who stay calm when something looks off.
*— Nick
Sendsync makes the move off Freshdesk faster
Most teams switching customer support software spend weeks on setup before they handle a single real ticket. Sendsync cuts that to minutes. Connect your Gmail or Microsoft 365 mailbox, invite your team, and you’re handling live conversations the same day. No DNS configuration, no per-agent fees, no six-step onboarding wizard.
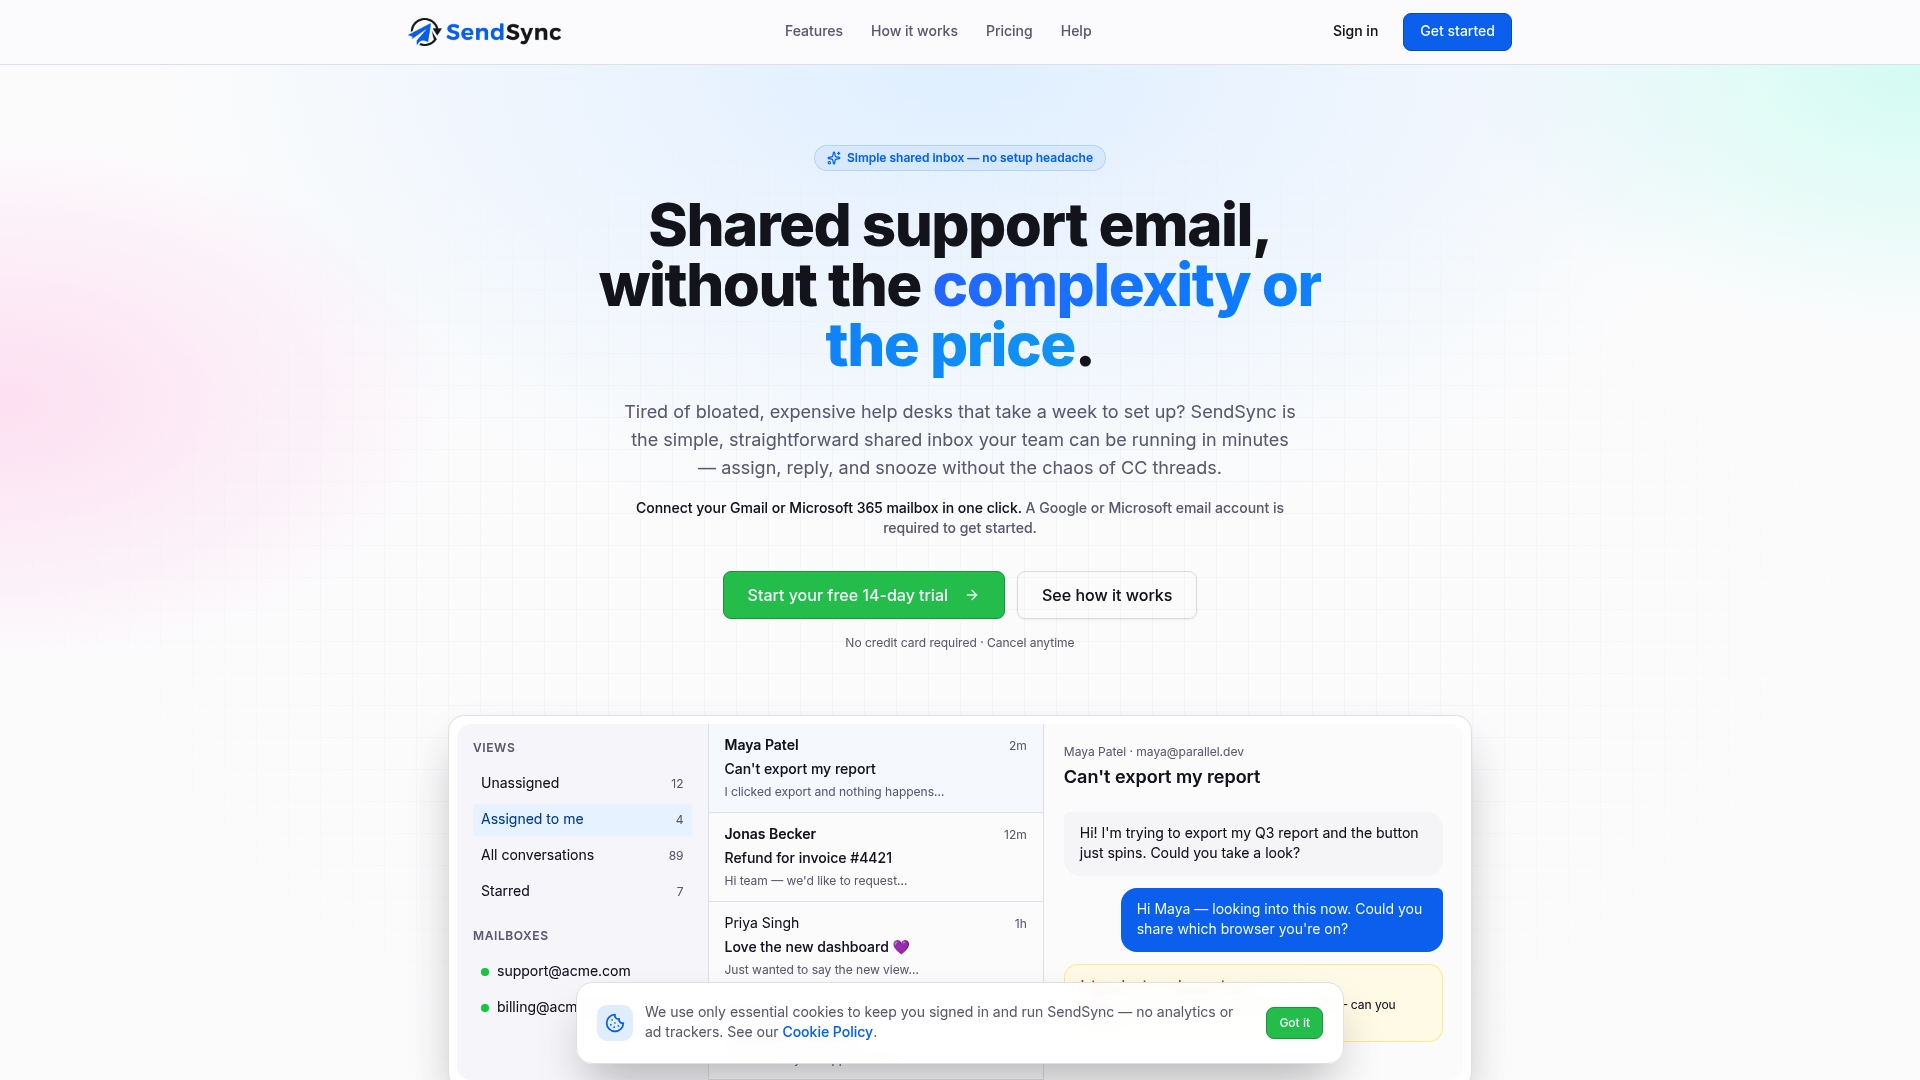
Where Freshdesk charges more as your team grows, Sendsync’s unlimited-user plans keep costs flat. Where Freshdesk requires admin overhead to manage automations and ticket views, Sendsync gives agents a clean shared inbox with assignment, internal notes, tagging, and saved views built in from day one.
Start a 14-day free trial at Sendsync and run your first real support conversation in the new system today. No credit card required.
Sources
- Freshdesk to Zoho Desk Migration for Support Teams | Zolify
- Help Desk Migration | Capterra listing
- Help Desk Migration services reviews | G2
- Best Freshdesk alternatives (Spotsaas)