
Load-Based Assignment: A Practical Setup Guide for Support Teams
Load-Based Assignment: A Practical Setup Guide for Support Teams ! Hand adjusting ticket load counter dial Load-based assignment routes new tickets to the agent with the most available capacity, keeping queues stable and SLAs intact.

Load-based assignment routes new tickets to the agent with the most available capacity, keeping queues stable and SLAs intact. The recommended first move: pick one load metric (open assigned tickets works for most teams) and run a one-week pilot with a small group before rolling out broadly.
Quick verdict:
- Default metric: open assigned conversations (simple, transparent, easy to audit)
- Starting capacity: a moderate number of concurrent tickets per agent suitable for your team and queue complexity
- Skip it when: your team has fewer than four agents, or every ticket requires a single named specialist
Load-based assignment is sometimes called capacity-aware routing in vendor documentation. Both terms describe the same mechanism: the system checks how many active tickets each available agent holds, then assigns the next ticket to whoever has room. Round-robin ignores that check entirely. Skill-based routing filters by capability but doesn’t account for how busy the matched agent already is. Load-based assignment adds that capacity layer on top.
Key Takeaways
Load-based assignment works best when you start with a simple metric, set conservative capacity limits, and measure for a full week before tuning.
| Point | Details |
|---|---|
| Pick one metric first | Open assigned ticket count is the most transparent starting metric for most teams. |
| Set conservative capacity | Start at 10–15 tickets per agent; adjust down for complex or high-touch queues. |
| Pilot before full rollout | Run 4–8 agents for five business days and define success criteria before you start. |
| Monitor manual reassigns | A rate above 15% signals your routing rules don’t match actual team workflows. |
| Sendsync for fast pilots | Sendsync’s same-day setup and unlimited-user pricing make a low-friction pilot realistic. |
Table of Contents
- What is load-based assignment and when should you use it?
- How load is actually measured in practice
- What are the core building blocks of an assignment policy?
- Step-by-step checklist to implement load-based assignment
- What system behavior should you expect in common scenarios?
- Known limitations, edge cases, and troubleshooting
- What metrics should you monitor and how often?
- How Sendsync implements lightweight load-based assignment
- Sendsync makes load-based routing fast to pilot
- Sources
What is load-based assignment and when should you use it?
At its core, load-based assignment is a workload distribution method that measures each agent’s current ticket count (or weighted equivalent) before routing. The system picks the agent with the lowest load among those who are available and qualified. That single check is what separates it from round-robin, which cycles through agents in order regardless of how backed up any one of them is.
When it fits well:
- Teams of five or more agents handling a mixed ticket volume
- Queues where ticket complexity varies (billing questions alongside technical escalations)
- SLA-sensitive environments where a backed-up agent is a compliance risk
- Teams that already have skill tags or groups configured and want to add a capacity filter on top
When it doesn’t fit:
- Teams of two or three agents where any routing logic adds overhead without meaningful benefit
- Queues where every ticket must go to one named expert regardless of their load
- Environments where tickets are so short-lived (under two minutes) that load counts change faster than the routing engine can act
A quick decision checklist: Do you have five or more agents? Do tickets vary in complexity or priority? Are you missing SLAs because one agent is buried while others are idle? If you answered yes to two of those three, load-based assignment is worth piloting.
How load is actually measured in practice
The term “load” sounds abstract until you have to configure it. In practice, teams use one of a handful of concrete metrics, each with real trade-offs.
Common load metrics:
- Open assigned ticket count: the simplest option. Count every ticket currently assigned to an agent and not yet resolved. Easy to audit, easy to explain to agents.
- Active tickets with SLA timer running: excludes tickets waiting on a customer reply. More accurate for SLA-heavy teams, but requires your helpdesk to track SLA pause states correctly.
- Weighted ticket count: assigns a numeric weight to each ticket based on priority or complexity (e.g., a P1 ticket counts as 3, a standard ticket counts as 1). More precise, but requires ongoing weight maintenance.
- Time-in-progress: measures total minutes an agent has spent on active tickets. Useful when ticket handling time varies wildly, but harder to implement and explain.
- Concurrent chat sessions: for live-chat or messaging queues, counts simultaneous open conversations rather than total tickets.
Two quick calculation examples:
Simple concurrent count: Agent A has 8 open tickets, Agent B has 12, Agent C has 6. Capacity limit is 15. The next ticket goes to Agent C (lowest load, most headroom).
Weighted count: Agent A holds two P1 tickets (weight 3 each) and four standard tickets (weight 1 each), for a weighted load of 10. Agent B holds one P1 and eight standard tickets, for a weighted load of 11. Agent A gets the next ticket despite having fewer total tickets.
Handling edge cases in the count:
Snoozed tickets and tickets paused by SLA rules should generally be excluded from the active load count, since the agent isn’t actively working them. Manual assignments bypass the routing engine but still increment the agent’s load counter, so a manager who manually assigns five tickets to one agent will temporarily push that agent over capacity. Most platforms count manual assignments the same as automatic ones; verify this in your configuration before going live.
The broader principle here mirrors what high-performance memory allocators do with per-thread heaps: avoid centralizing all routing decisions through one bottleneck. Partitioning by skill group or team before applying load rules reduces contention on the assignment engine in high-volume environments.
What are the core building blocks of an assignment policy?
A load-based assignment policy isn’t a single toggle. It’s a stack of rules that execute in order. Getting that order right determines whether your routing behaves predictably under pressure.
The four building blocks:
- Primary load rule: the capacity check itself. Defines the metric (open tickets, weighted count) and the per-agent ceiling.
- Skill or group filters: narrow the eligible agent pool before the load check runs. Example: only route billing tickets to agents tagged “billing.”
- Availability check: confirms the agent is online and not in a status that blocks assignment (lunch, training, DND).
- Priority overrides and escalation rules: high-priority tickets can bypass the normal load check and route to the least-loaded senior agent, or escalate directly to a team lead if no one is available.
Policy interaction trade-offs:
| Policy order | Behavior | Best for |
|---|---|---|
| Skills first, then load | Only load-checks agents who match the skill tag | Specialized queues with clear skill segmentation |
| Load first, then skills | Finds the least-loaded agent, then checks skill fit | General queues where most agents can handle most tickets |
| Priority override first | Pulls high-priority tickets out of normal routing entirely | SLA-critical environments with tiered ticket severity |
Skills-first keeps ticket quality high but can create idle agents if skill pools are narrow. Load-first distributes more evenly but risks mismatches if skill coverage is uneven. Most teams start with skills-first, then relax skill requirements after measuring mismatch rates.
Policy-definition checklist:
- [ ] Define every skill tag and confirm agents are tagged correctly before enabling routing
- [ ] Set a fallback rule for when no agent matches the skill filter (queue, escalate, or assign to a group)
- [ ] Decide whether priority tickets bypass load rules or simply get routed to the least-loaded qualified agent
- [ ] Document what happens when all agents are at capacity (hold in queue, alert a manager, or overflow to a secondary group)
- [ ] Test each rule path in a staging environment or with a small pilot group before full rollout
Effective workload distribution aligns assignments to skill, availability, and realistic capacity — configuring capacity thresholds and alerts is what keeps that alignment from drifting over time.
Step-by-step checklist to implement load-based assignment
This sequence works regardless of which helpdesk platform you’re using. Adapt the specifics to your tool’s configuration UI.
Preflight
- Inventory your queues. List every active queue, its average daily ticket volume, and the agents who handle it.
- Map skills to ticket types. Confirm every ticket category has at least one skill tag and that agents are tagged accordingly.
- Pick your primary load metric. Start with open assigned ticket count unless you have a strong reason to use weighted counts.
- Set initial capacity values. Start conservatively with agent ticket capacity values suitable for your context; consider lowering limits for complex or high-touch queues. Map realistic capacity by subtracting meetings and overhead from available hours before setting these numbers.
Configuration
- Enable load-based routing mode in your helpdesk’s assignment settings.
- Set per-agent capacity limits at the agent or group level.
- Define assignment preference order (skills first or load first, per the trade-offs above).
- Configure availability rules: which agent statuses block assignment, and how long an agent can be unavailable before tickets reroute.
- Set SLA counting rules: confirm whether snoozed or pending-customer tickets count toward load.
- Configure fallback behavior: what happens when all agents in a group are at capacity.
Pilot plan
- Select a pilot group: 4–8 agents from one queue, representing a mix of experience levels.
- Run the pilot for five business days before drawing conclusions.
- Define success criteria upfront: SLA compliance rate holds or improves, queue depth stays flat or drops, manual reassignment frequency drops by a measurable amount.
- Set rollback criteria: if SLA compliance drops more than 5 percentage points in the first 48 hours, pause and investigate before continuing.
- Communicate the pilot to agents before it starts. Explain what changes, what stays the same, and how they can flag problems.
Verification
- Check load counts in real time for the first hour after enabling routing. Confirm tickets are distributing across agents, not stacking on one.
- Review assignment logs after the first 50 tickets to verify the routing engine is applying rules in the expected order.
- Confirm manual assignments increment load counters correctly so managers don’t accidentally push agents over capacity.
Pro Tip: Set a calendar reminder for day 3 of the pilot to review queue depth and SLA data. Early signals are more actionable than end-of-week summaries, and catching a misconfiguration on day 3 beats discovering it on day 6.
What system behavior should you expect in common scenarios?
Knowing what “correct” looks like helps you spot misconfiguration fast.
Scenario 1: Balanced distribution, multiple agents available Three agents are online. Agent A has 7 tickets, Agent B has 9, Agent C has 6. Capacity limit is 15. A new ticket arrives. Expected behavior: the system assigns it to Agent C. If it goes to Agent B instead, check whether your load metric is counting correctly or whether Agent C has a status that blocks assignment.

Scenario 2: One agent reaches capacity Agent B hits 15 tickets. A new ticket arrives that matches Agent B’s skill tag. Expected behavior: the system skips Agent B and routes to the next least-loaded qualified agent. If the system still assigns to Agent B, your capacity ceiling may not be enforced at the routing level. Some platforms allow “excess” assignments with a warning rather than a hard block; know which behavior your tool uses.
Scenario 3: All agents at capacity Every agent in the group is at or above their limit. Expected behavior depends on your fallback rule: the ticket holds in queue until someone frees a slot, escalates to a manager or overflow group, or triggers an alert. If tickets are silently dropping or routing to random agents, your fallback rule is either missing or misconfigured.
Scenario 4: Manual assignment and load counts A manager manually assigns three tickets to Agent A. Expected behavior: Agent A’s load counter increases by three, reducing the number of tickets the routing engine will auto-assign to them. This is correct behavior, not a bug. Warn managers that manual assignments consume capacity the same way automatic ones do.
Known limitations, edge cases, and troubleshooting
Load-based assignment works well in steady-state conditions. It gets noisy at the edges.
Limitations to plan for:
- Small-team noise: with fewer than five agents, one agent going to lunch can swing load distribution dramatically. Round-robin may actually produce more stable results at this scale.
- Skill mismatches: if skill tags are stale or agents are tagged for skills they no longer handle, the routing engine will route correctly by load but incorrectly by capability.
- Priority gaming: agents who learn that closing tickets reduces their load count may close tickets prematurely to stay under capacity. Monitor reopened-ticket rates as a signal.
- Long-running tickets skewing load: a ticket open for three days counts the same as one opened three minutes ago. Weighted metrics or time-decay rules can correct this, but add configuration complexity.
Troubleshooting checklist:
- Tickets stacking on one agent despite load rules: check whether that agent’s skill tags make them the only match for a common ticket type. Broaden the skill pool or add a secondary skill group.
- SLA compliance dropping after rollout: verify that capacity limits aren’t set too high. An agent at 20 tickets may technically be “under capacity” but practically unable to respond within SLA windows.
- Agents reporting unfair distribution: pull a load distribution report for the pilot period. If one agent consistently receives more tickets, check for skill-tag imbalances or an availability status that’s blocking other agents.
- Manual reassignment frequency increasing: this is a signal that the routing rules don’t match actual team workflows. Regular reassessment and redistribution are necessary as priorities and team composition change.
Red flags that require immediate action:
- SLA compliance drops more than 5 percentage points within 48 hours of enabling routing
- Queue tail (tickets older than your SLA threshold) grows for two consecutive days
- Managers are manually overriding more than 20% of auto-assignments
Any of these warrants pausing the rollout, reviewing assignment logs, and adjusting configuration before re-enabling. Managers should also map automated escalation paths so queues exceeding defined limits trigger a reassign or escalation automatically rather than silently backing up.
What metrics should you monitor and how often?
Routing configuration isn’t a one-time task. The metrics below tell you whether your assignment policy is working and when it needs tuning.
Key KPIs to track:
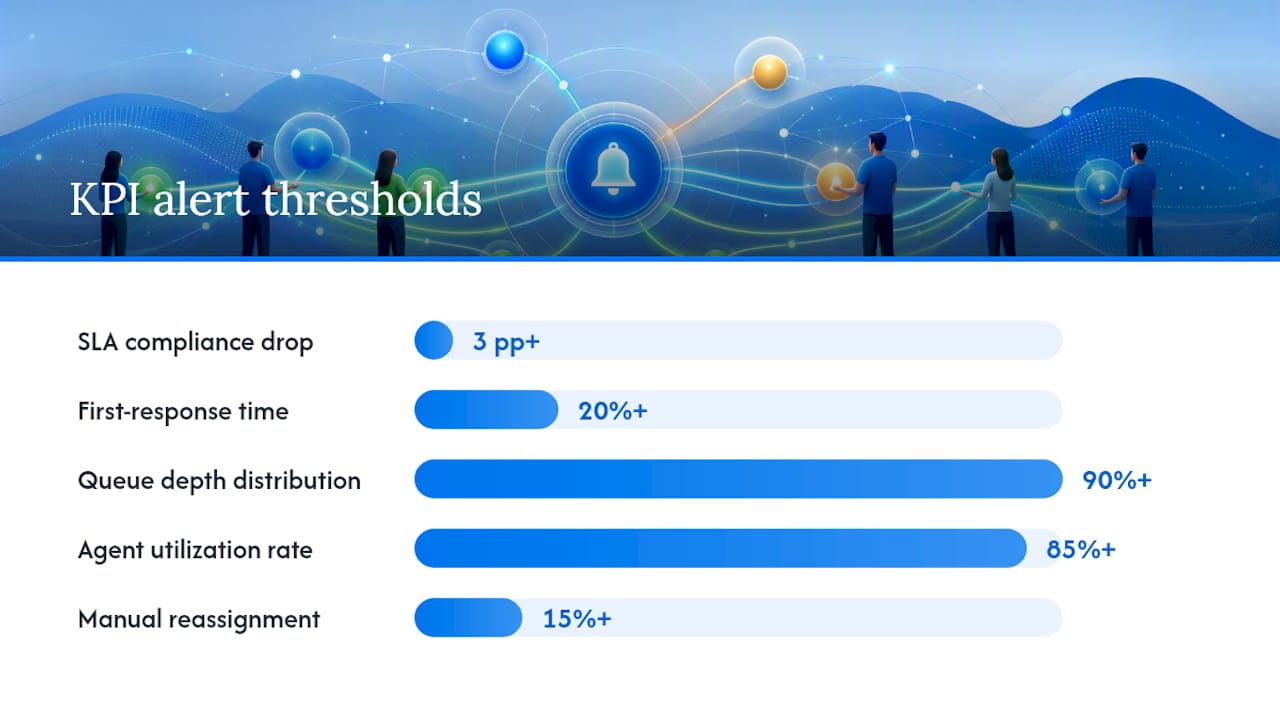
| KPI | What it signals | Alert threshold |
|---|---|---|
| SLA compliance rate | Whether agents are responding within target windows | Drop of 3+ percentage points week-over-week |
| Mean time to first response | Speed of initial pickup across the team | Increase of 20%+ versus pre-pilot baseline |
| Queue depth distribution | Whether tickets are spreading evenly or stacking | Any agent consistently at 90%+ of capacity |
| Agent utilization rate | Whether capacity limits are calibrated correctly | Sustained utilization above 85% for 3+ days |
| Manual reassignment frequency | Whether routing rules match real workflows | More than 15% of tickets manually reassigned |
Suggested monitoring cadence:
- During pilot (days 1–5): check queue depth and SLA compliance daily. Review assignment logs after the first 50 tickets.
- Rollout weeks 1–4: weekly review of all five KPIs. Adjust capacity limits or skill tags based on what you see.
- Steady state: monthly review. Look for drift in utilization rates and manual reassignment frequency as team composition changes.
Pro Tip: *Build a simple dashboard that shows each agent’s current load as a percentage of their capacity limit, not as a raw ticket count.
For A/B pilots, split one queue into two groups: one using load-based routing, one using your existing method. Run both for two weeks before comparing SLA compliance and first-response times. Shadow mode (routing decisions logged but not executed) is useful for validating rule logic before going live, if your platform supports it.
How Sendsync implements lightweight load-based assignment
Sendsync’s shared inbox is built around the idea that assignment should be fast and visible, not buried in configuration menus. The product connects directly to Gmail or Microsoft 365 without DNS changes, which means a pilot can be running within a day of signup rather than after a week of IT setup.
Here’s a minimal load-based setup in Sendsync:
- Connect your mailbox. Link your Gmail or Microsoft 365 inbox. No DNS changes required.
- Create agent groups. Organize agents by skill or queue (billing, technical, general). This becomes the skill filter layer.
- Set concurrent assignment limits. In Sendsync’s assignment settings, define how many open conversations each agent can hold before the system stops auto-assigning to them.
- Enable automated routing. Turn on load-based assignment so new conversations route to the agent in the relevant group with the fewest open assigned conversations.
- Run a five-day pilot. Start with one group of 4–6 agents. Track manual reassignment frequency and first-response time daily.
Expected early wins within the first week: fewer conversations sitting unassigned, clearer ownership (each conversation has one named agent), and less time spent by managers manually triaging the inbox. Sendsync’s unlimited-user pricing means adding agents to the pilot group doesn’t increase cost, which makes it practical to test with a representative sample rather than a minimal one.
For teams already using shared inbox assignment heuristics, Sendsync’s approach fits naturally into an existing workflow rather than replacing it.
The case for starting small and measuring everything
The teams that get the most out of load-based assignment share one habit: they treat the first rollout as a measurement exercise, not a configuration exercise. The goal of week one isn’t a perfect routing policy. It’s a baseline. You need to know what your SLA compliance rate, first-response time, and manual reassignment frequency look like under load-based routing before you start tuning weights or adjusting capacity limits.
The temptation is to build a sophisticated policy upfront: weighted tickets, skill tiers, priority overrides, escalation chains. Resist it. Simple routing rules, like the first-fit heuristics that outperform complex optimal-seeking algorithms in task-packing research, tend to produce more predictable behavior and easier debugging. Add complexity only when you have data showing that the simple rule is failing in a specific, measurable way.
Skill alignment matters more than most teams expect. A load-based policy that routes evenly but ignores skill fit will produce fast assignments and slow resolutions. Get your skill tags right before you tune your capacity numbers.
Use this guide to run your pilot in a week: preflight on Monday, configuration on Tuesday, pilot live Wednesday through Friday, review the following Monday.
Sendsync makes load-based routing fast to pilot
Most support teams delay load-based assignment pilots because setup feels like a project. Sendsync removes that friction. Connect your Gmail or Microsoft 365 inbox in minutes, no DNS configuration, no IT ticket required. Set concurrent assignment limits per agent, enable automated routing, and your pilot is live the same day.
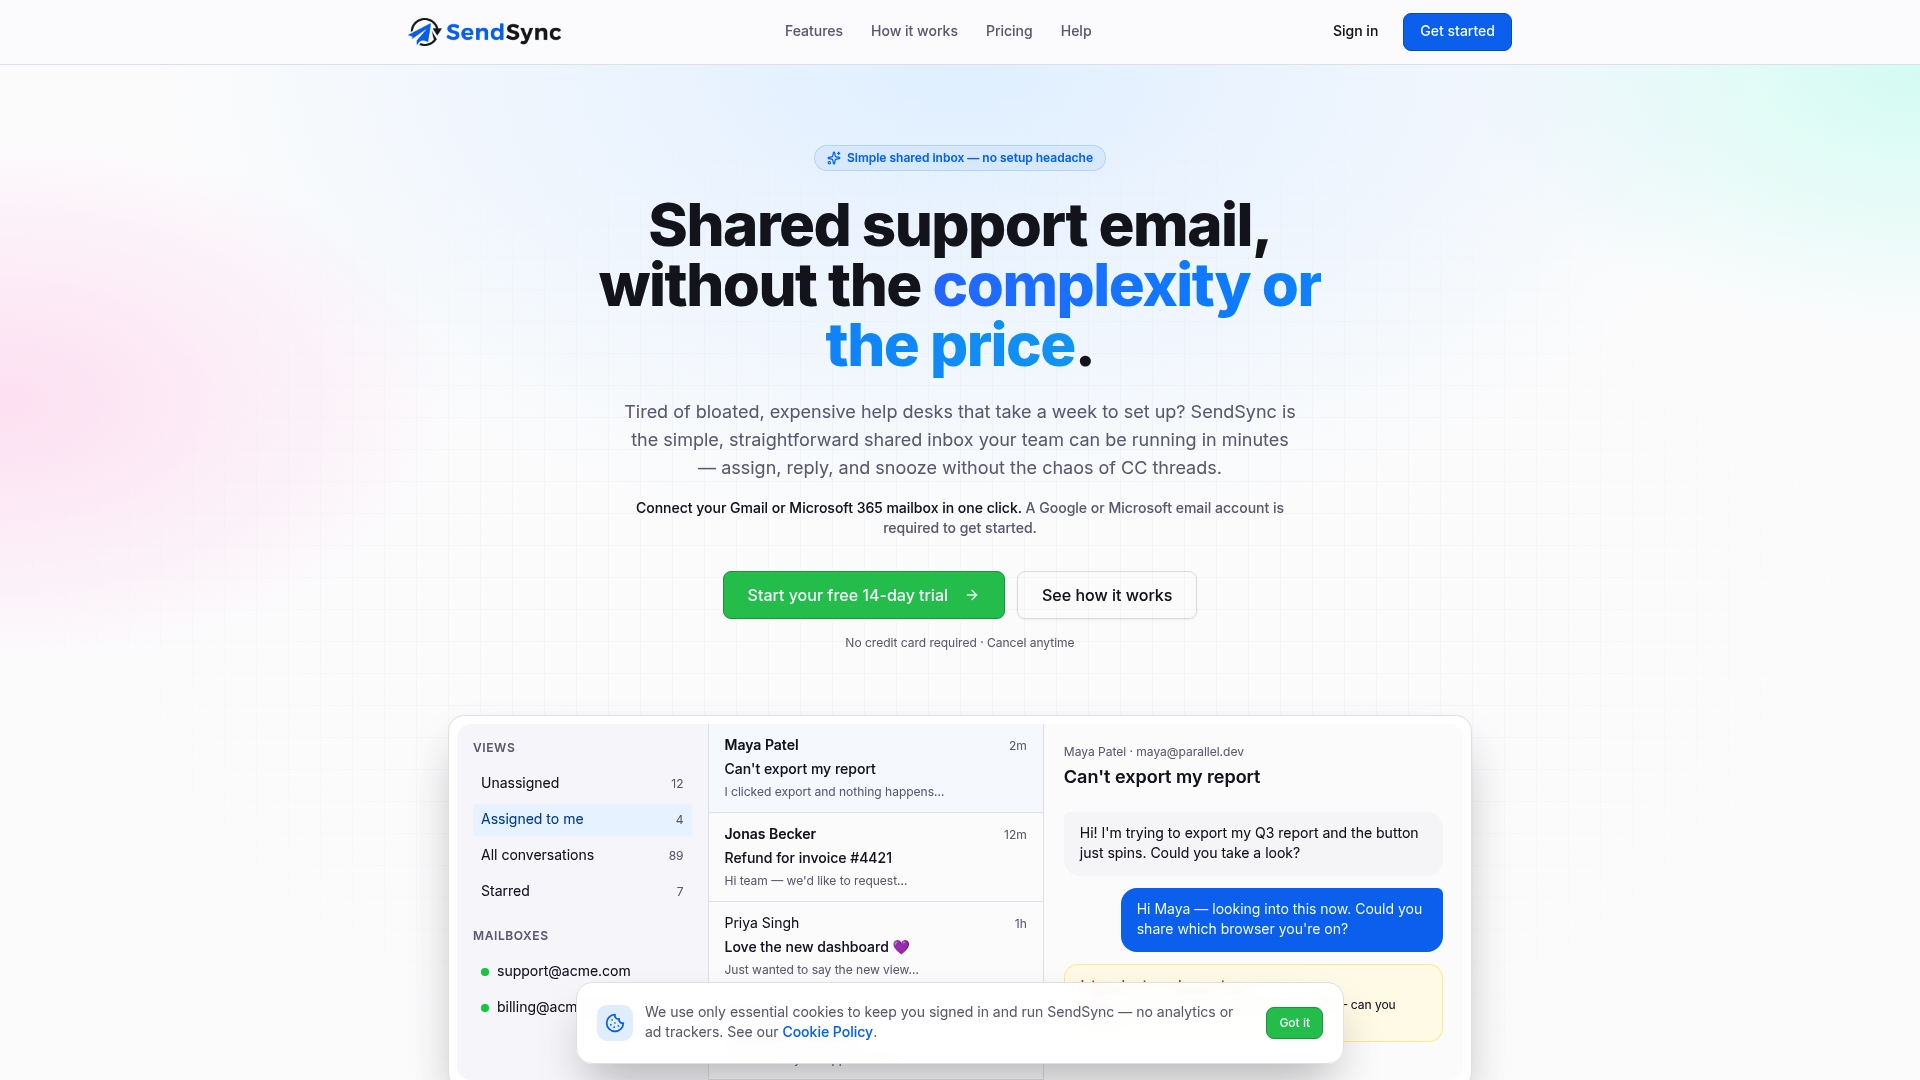
Sendsync’s unlimited-user pricing means you can run a full pilot with your entire team without per-seat costs inflating the experiment. Collaborative assignment, internal notes, and saved views give managers real-time visibility into load distribution without a separate dashboard tool. The 14-day free trial is long enough to complete a full pilot cycle and gather the baseline data you need to tune your policy with confidence.
Start your free trial at Sendsync and have load-based routing running by the end of the week.
Sources
- Workload Distribution Demystified: A How-to Guide
- Smart workload distribution: 6 tools and techniques for managers - Meister
- Strategies For Effective Workload Distribution | Complete Guide
- mimalloc: a high-performance, scalable memory allocator for the modern era